Renovating your home can be equal parts exciting and frustrating, we are here to take away your stress and give you a streamlined experience. Below you will find our estimation guide that will walk you through each step to finding you the best deal based on your project, budget, and location.
Already know what to do?
Then head right to our Fabrication Tool to get your quote today!
Estimation Guide
Step 1: Dimensions
The idea of measuring your kitchen may seem daunting but we will walk you through it. First, be prepared, you will need something to write on, something to write with, and of course a tape measure.
All set? Great, let's begin!
First, let's identify what shape your counters are, if you aren't sure please use our guide below.
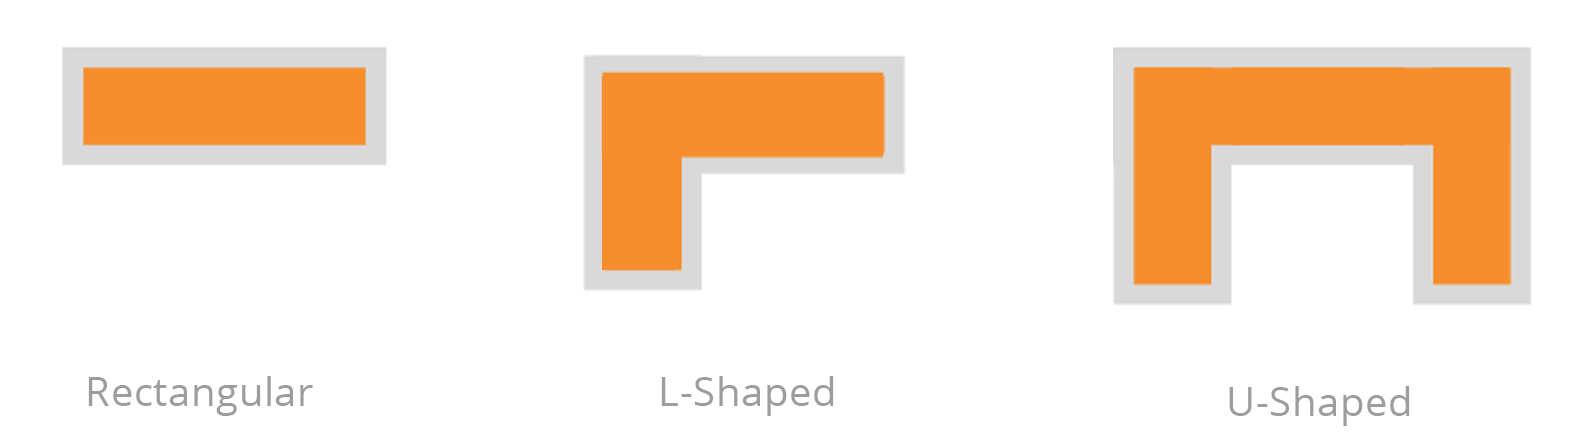
For a rectangular counter or island, we will need to know the length and width.
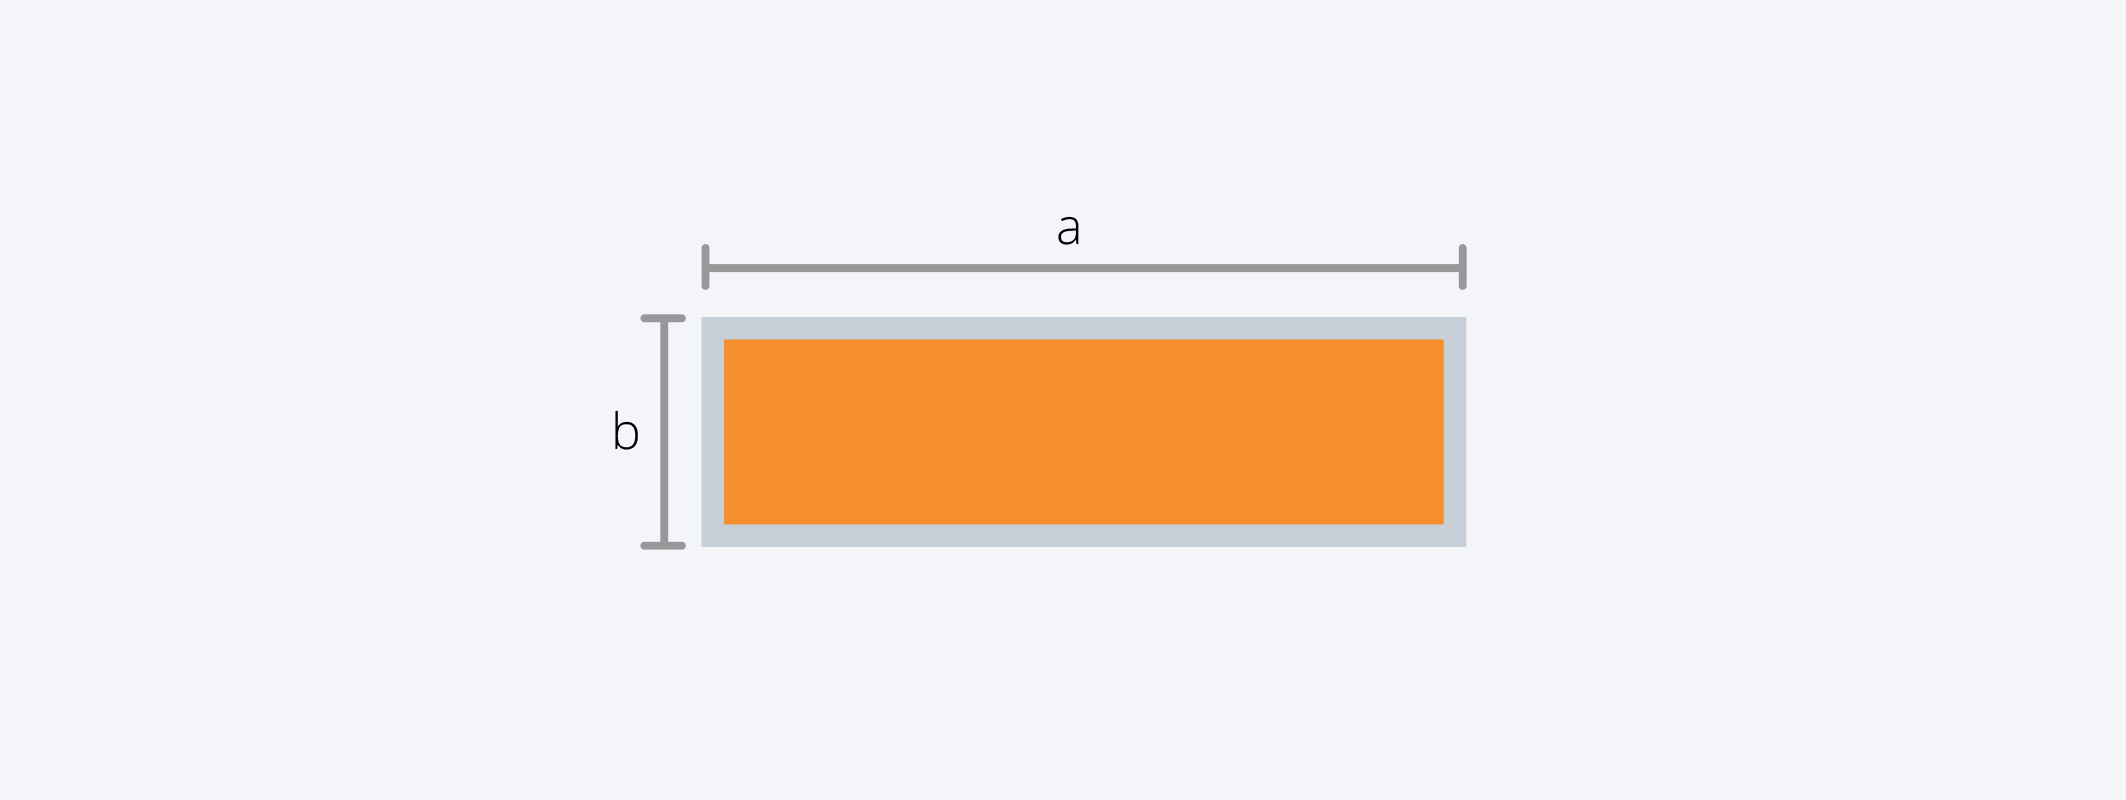
We have labeled them "a" and "b" so you can just measure the sides you need to know without having to second guess which side is length, width, or depth.
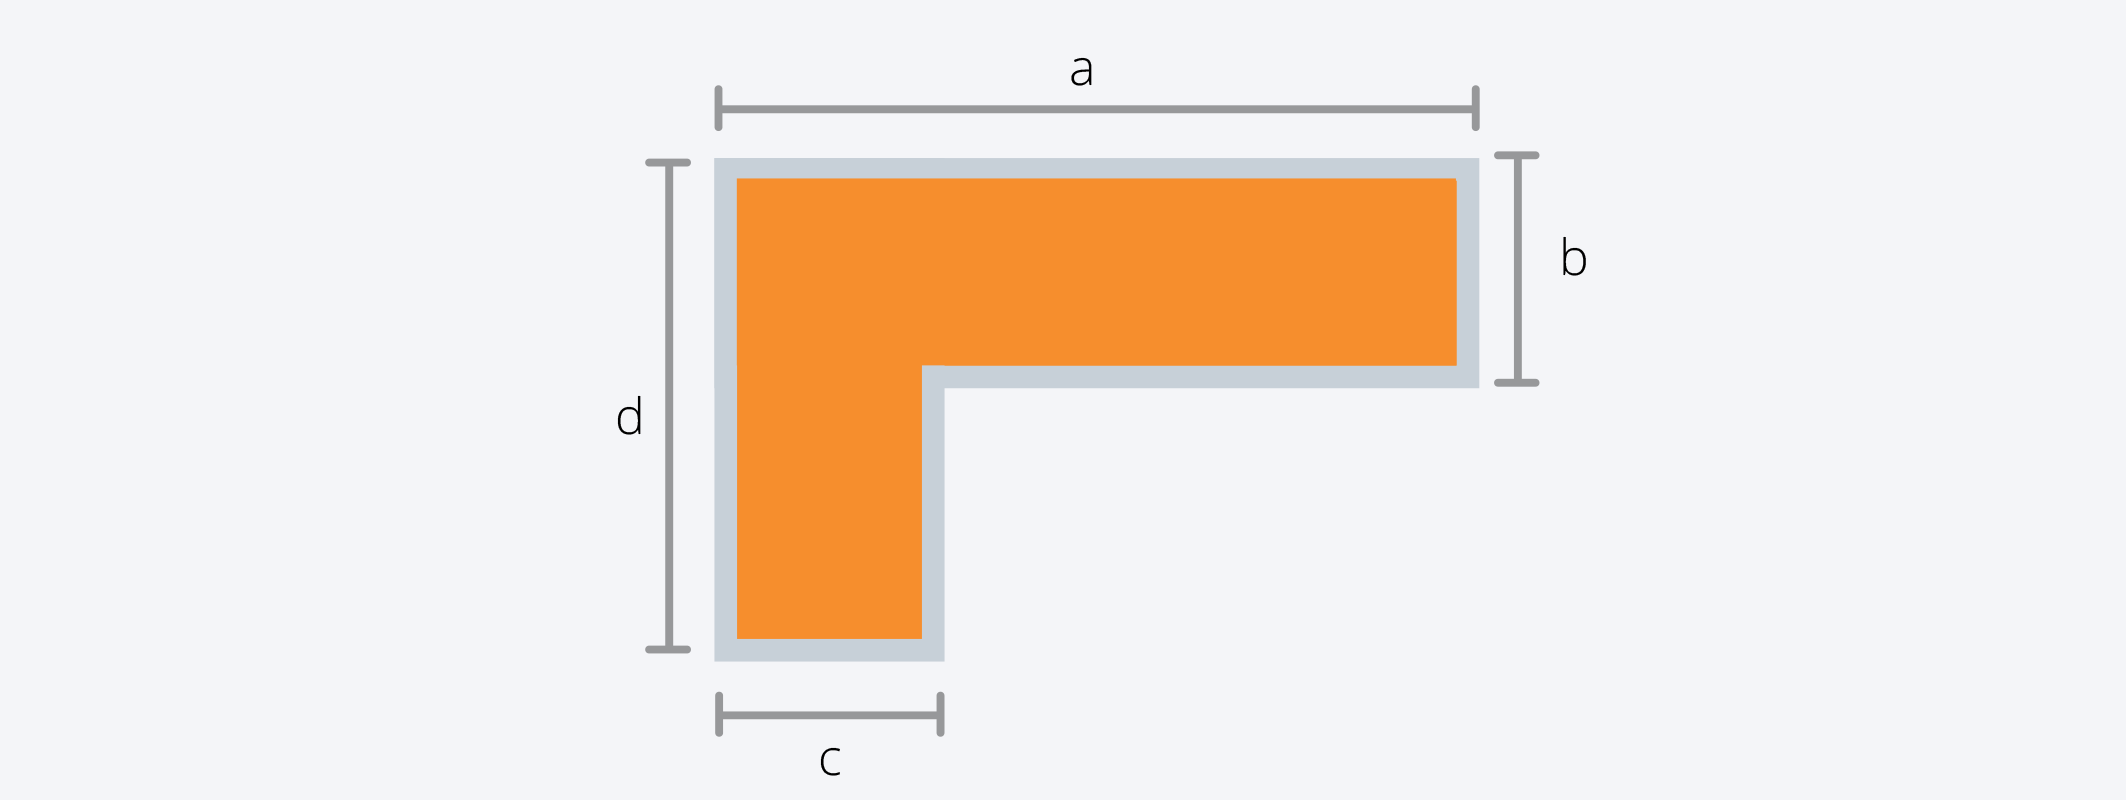
If you have an L-Shape counter, we will need two additional measurements, as shown in the diagram below.
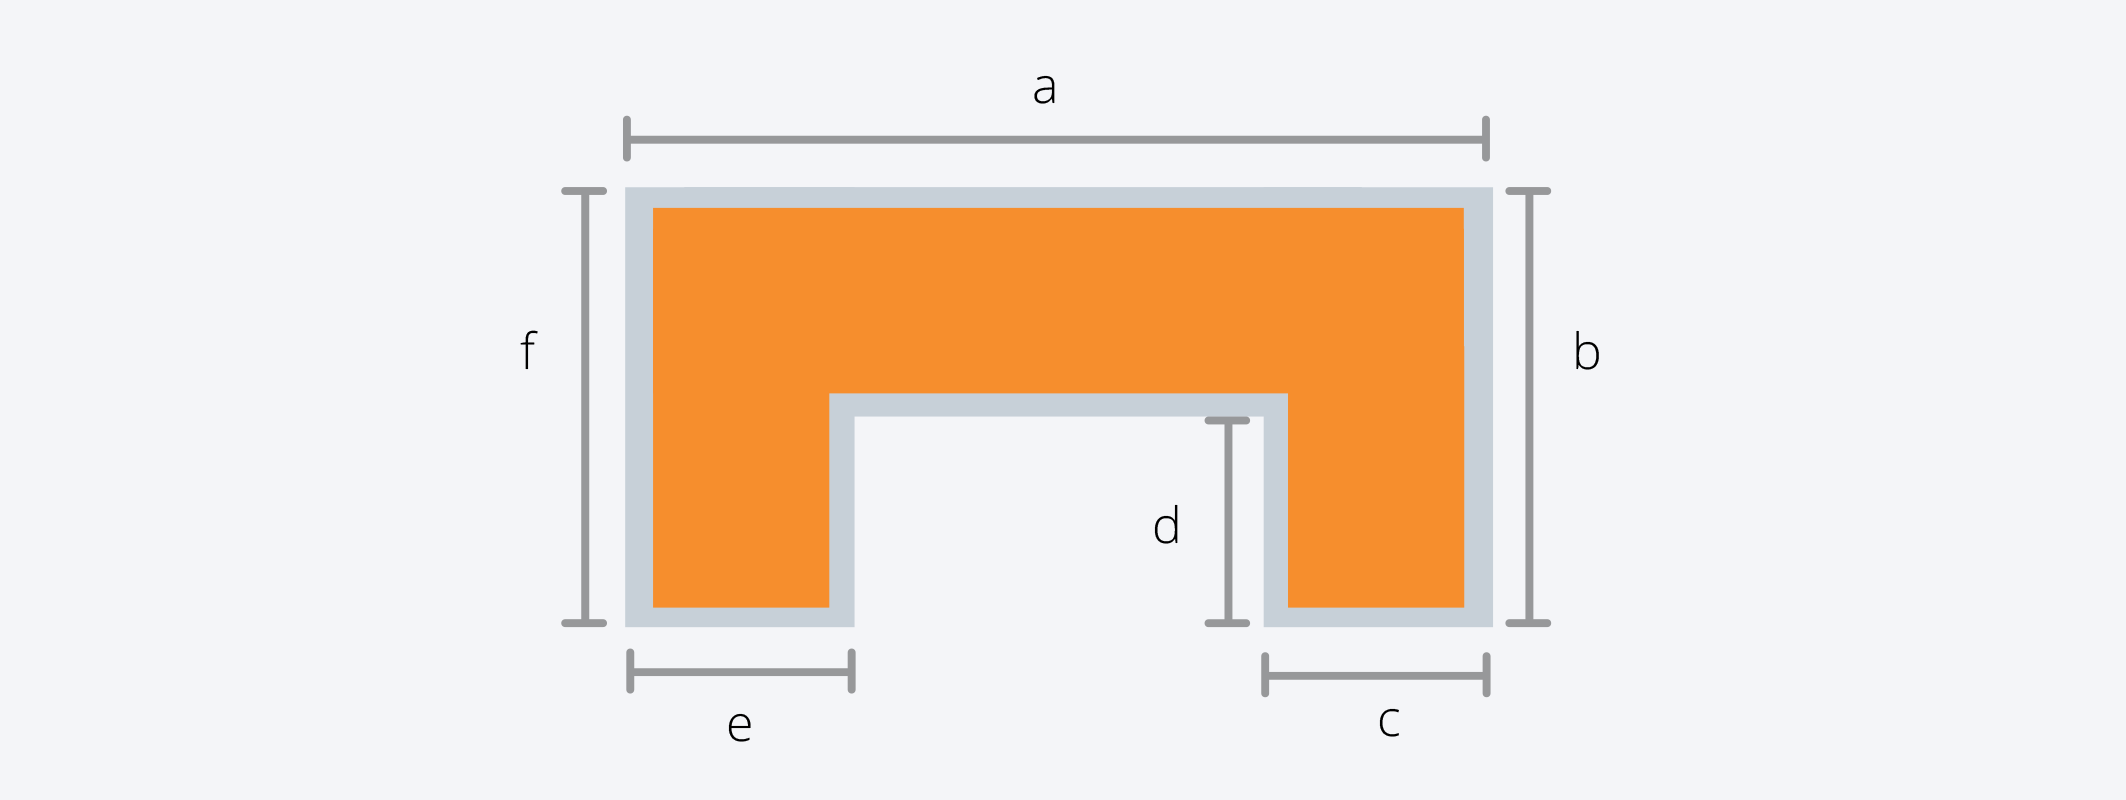
A U-Shape counter will require 4 additional measurements for both a symmetrical or asymmetrical configuration.
Have something different than above? Don't worry you can contact us at Fabrication@stonetrash.com for assistance.
Step 2: Cutouts
Cutouts are sections of your slab that need to be removed to fit such items as sinks, cooktops, and faucets. First, you'll want to make note of how many sinks you have, next identify what type of sink(s) you have, see the below diagram if you need any help.
We actually don't want you to measure your sink for the cutout instead we need to know which sink specifically will be in the cutout, meaning who makes it and what is the model name. If you don't have that information currently that's okay it won't affect your quote but it will be required before the templating stage. All we need to know now is the number of cutouts.
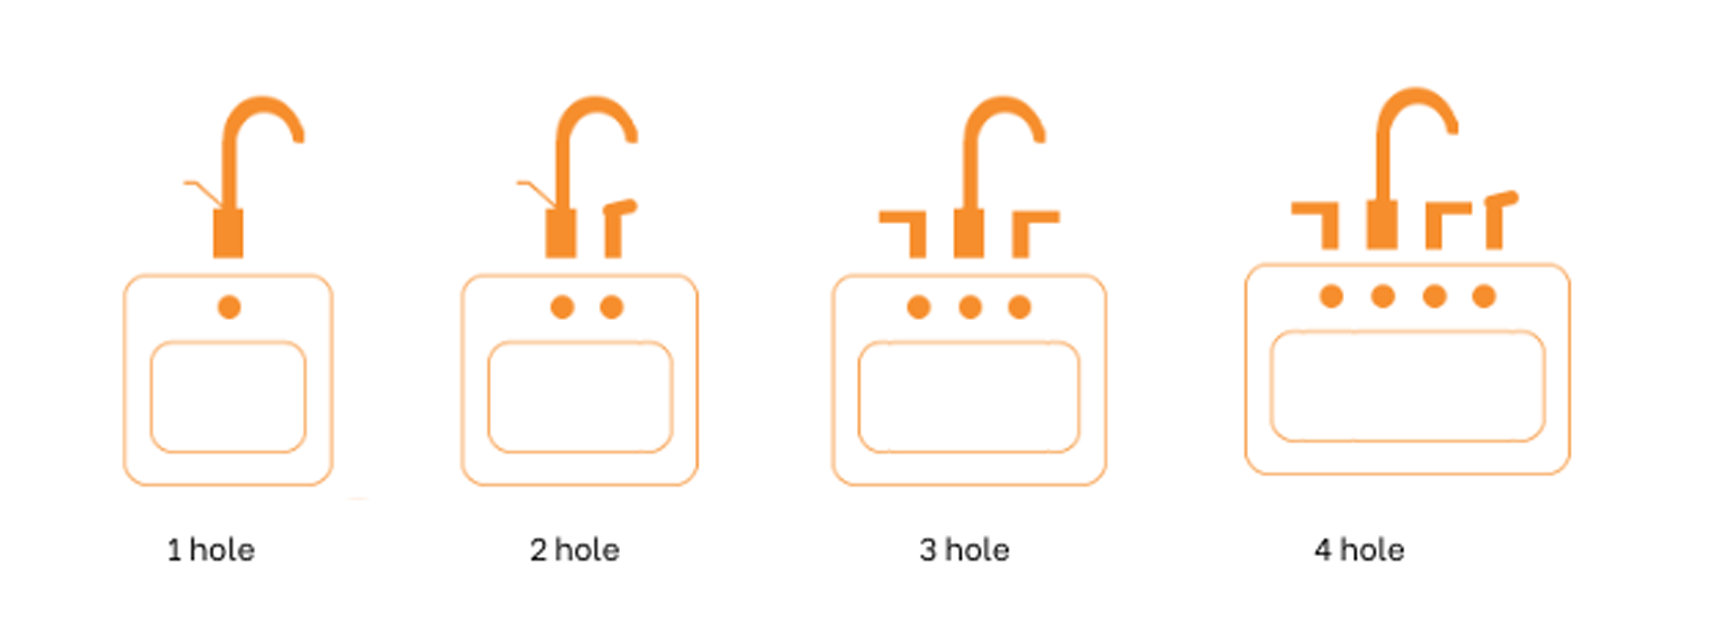
The next series of cutouts you'll need to note is for faucets. If you just have one central faucet that has a temperature handle built-in then you likely have only one hole, if you have separate handles for hot and cold then you probably have 3, but it is always good to double-check, see the diagram above if you need any help. If you have an instant hot water filter that will also be an additional cut.
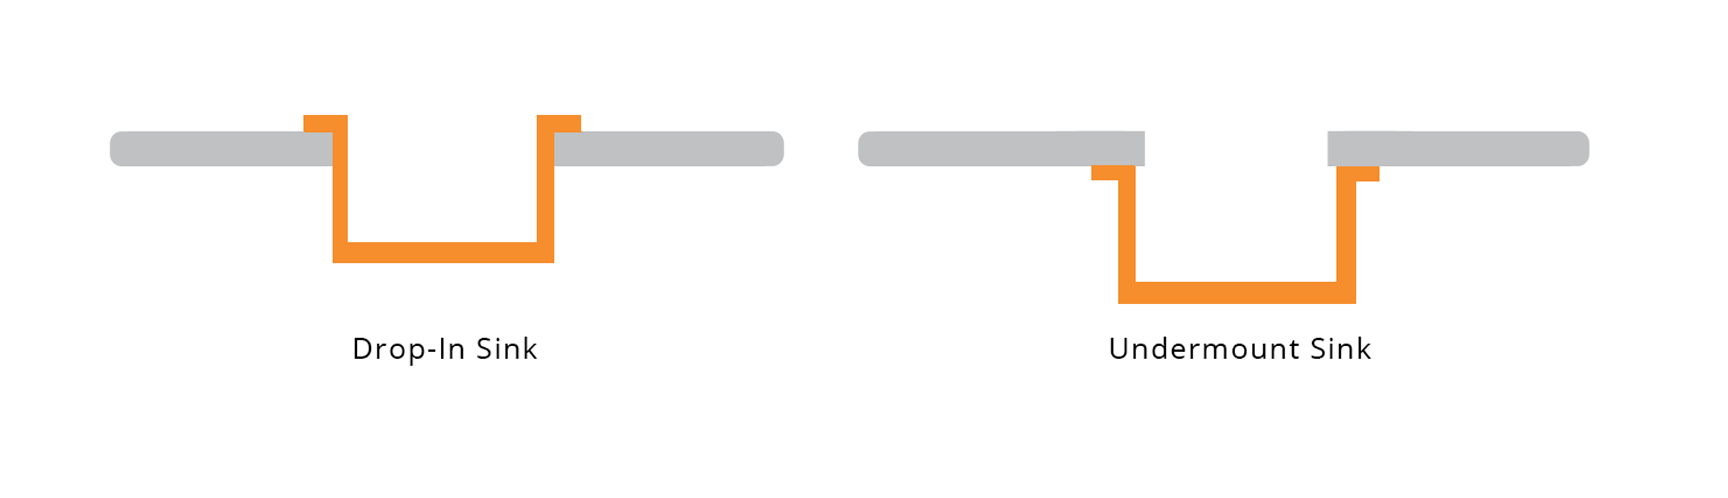
One more thing you'll have to think about for your sinks is how they are mounted, is it a drop-in or an undermount? This will adjust the cut made to your slab so we will need to know to get you an accurate quote. If you have a farmhouse sink that falls under the category of undermount. If you need any help in identifying the type of mount please use the diagram below.
Cooktops also require cutouts, in our fabrication estimate they are equivalent to a drop-in sink. Due to these being under the same category you'll want to be careful you add a cut out for any drop-in sinks AND a cooktop, before moving on to the next step.

Step 3: Edge Type
Selecting the edge type is like the cherry on top of your sundae, an extra little flourish that caps off your StoneTrash project. In addition to affecting the style of your room an edge type can also affect your wallet so it is an important decision to make. Below are different edge types, an eased edge is no additional costs however a beveled edge, demi bullnose, and a half bullnose will cost a little extra and a full bullnose or either of the ogee edge types could be even more but they definitely make a statement.
Tier 1

Tier 2

Tier 3

Tier 4

Think you know which one you like? If so great, if not that's alright you can always skip this step and come back to it later.
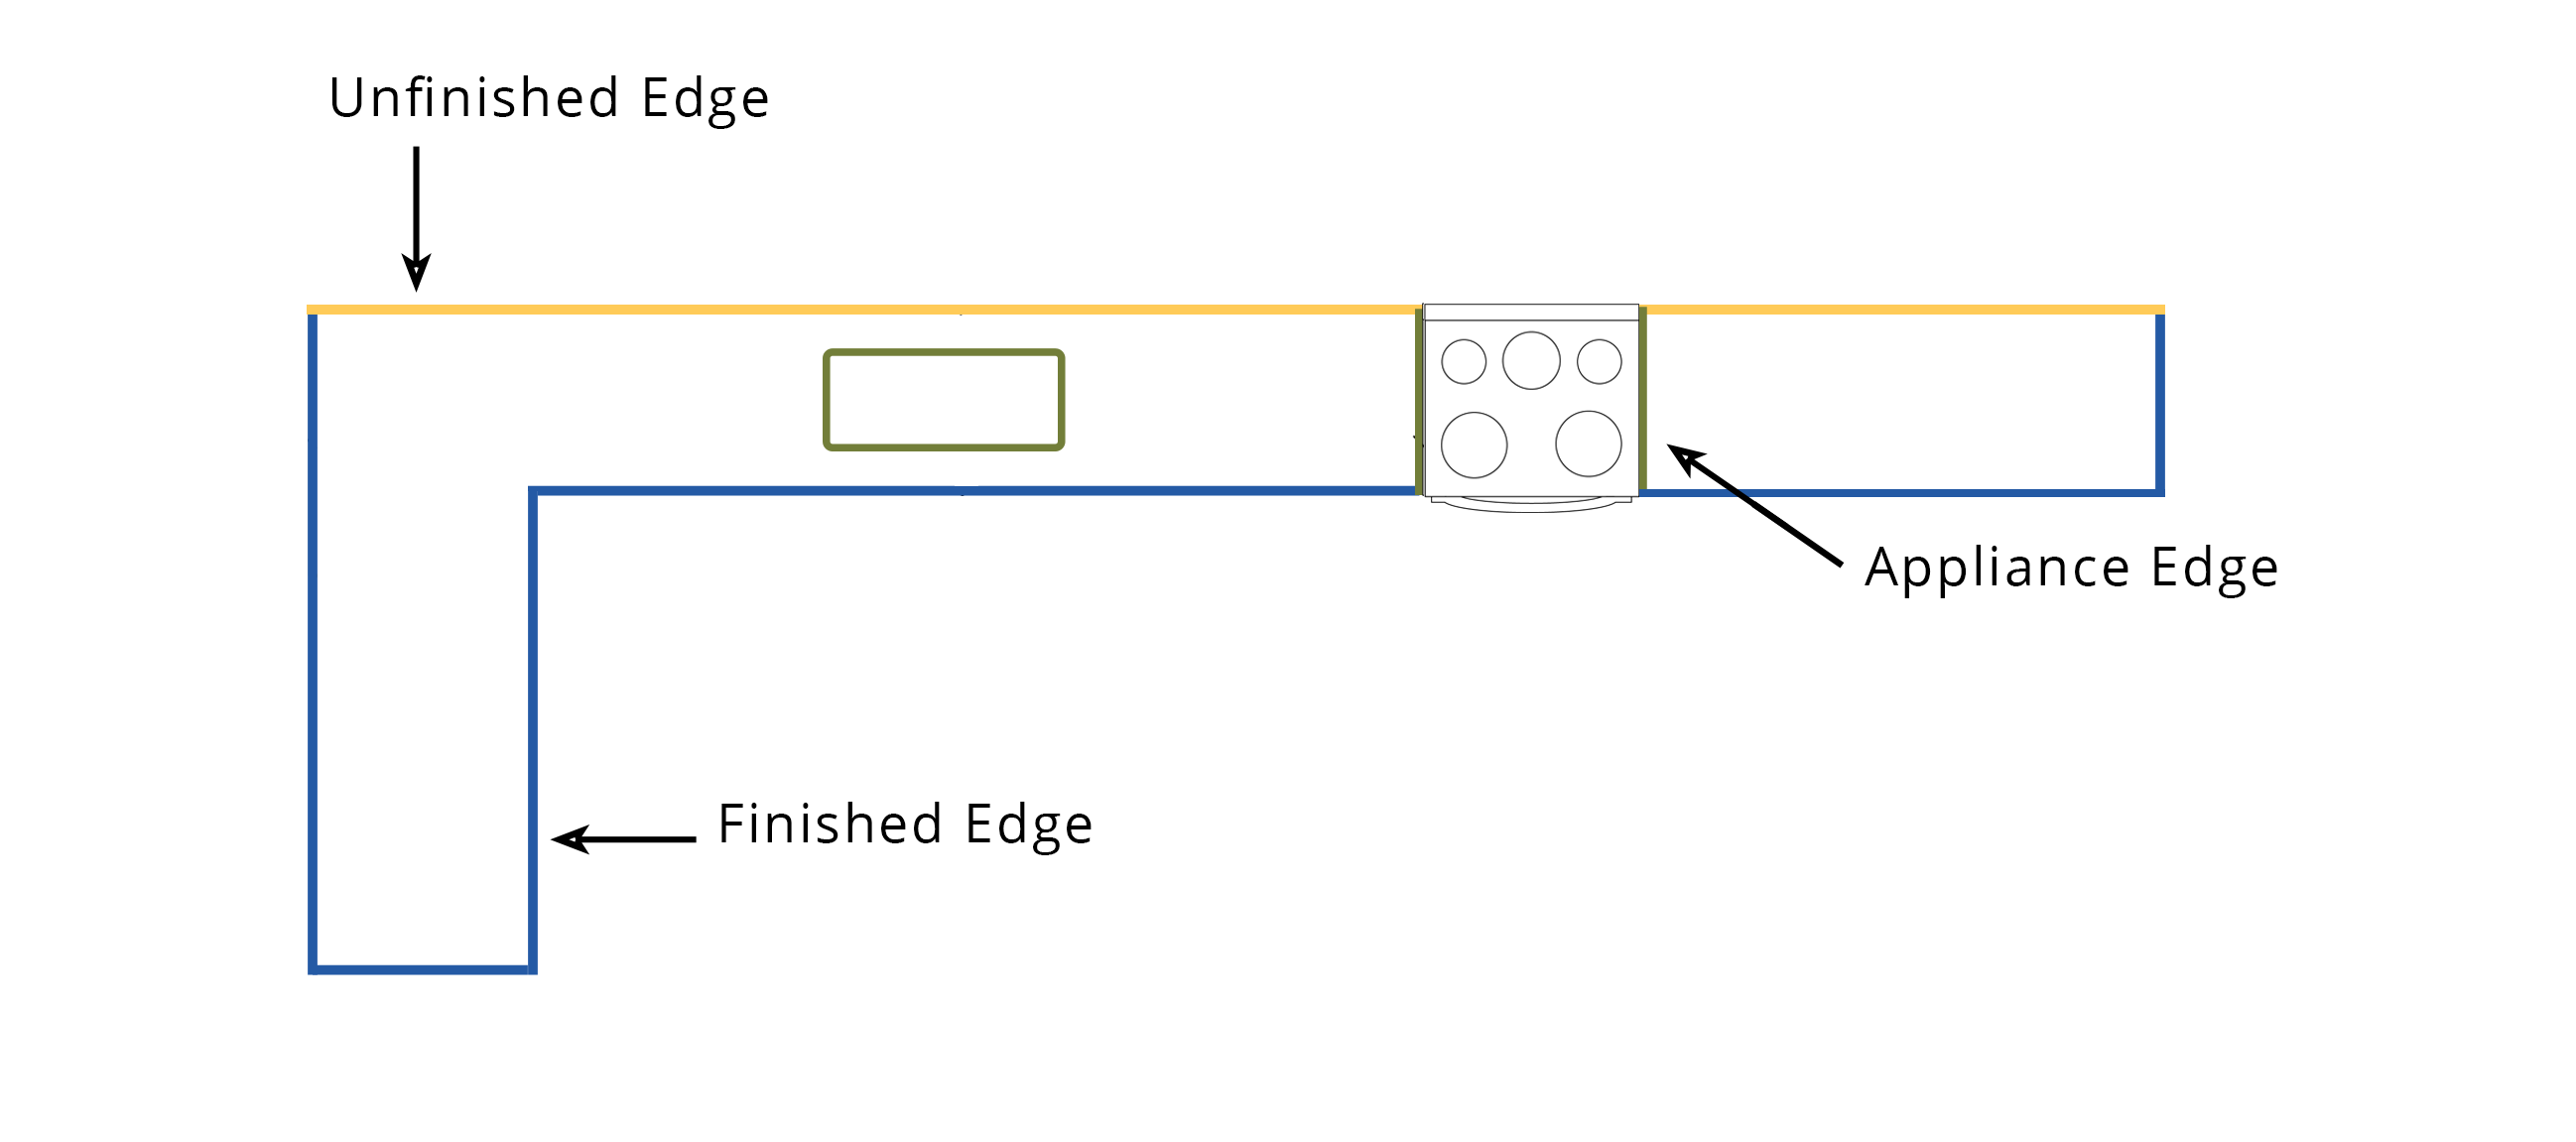
What we will need to know is what the edge finish is, that means is it a side that is facing the wall, facing an appliance or facing out? If the edge is facing the wall it can be left unfinished since it will never be seen. If there is an edge by a sink or oven we call that an appliance edge, those will need some attention from your fabricator. Lastly, finished edges are the edges that face out, these are the sides that your previous decision will affect.
Step 4: Installation
Congratulations you made it to the final step, installation! Here we just need to know if there are any flights of stairs that will need to be climbed when delivering the material, please let us know so that we can account for the extra required labor in our estimate.
If you have any other questions please feel free to reach out to us at Fabrication@stonetrash.com . Good luck with your project!