Everything you need to know to prepare for a template or install service.
Congratulations, the day has come for you to start the process of installing your new counter. This will happen in 3 steps, first will be the template appointment where skilled professionals take precise measurements of your space to ensure each cut made during fabrication is 100% accurate. The next step is fabrication where the cutouts are made, edges are finished. The last step is installation process. It is our goal that these steps are done in a timely manner and are of the highest quality, your assistance on step 1 and 3 are imperative for our goal to succeed. This article will walk you through everything you can do before during and after your service appointments to help keep things on track.
Skip to the bottom to download preparation checklists
Template Preparation
For a template service, you are typically given between a 4 and 5 hour window for when to expect your service provider to arrive on the job site. We require you or an adult you have given decision making power be present for the entire service window. In addition to just being present, there are 5 important steps you can take to ensure a great appointment.
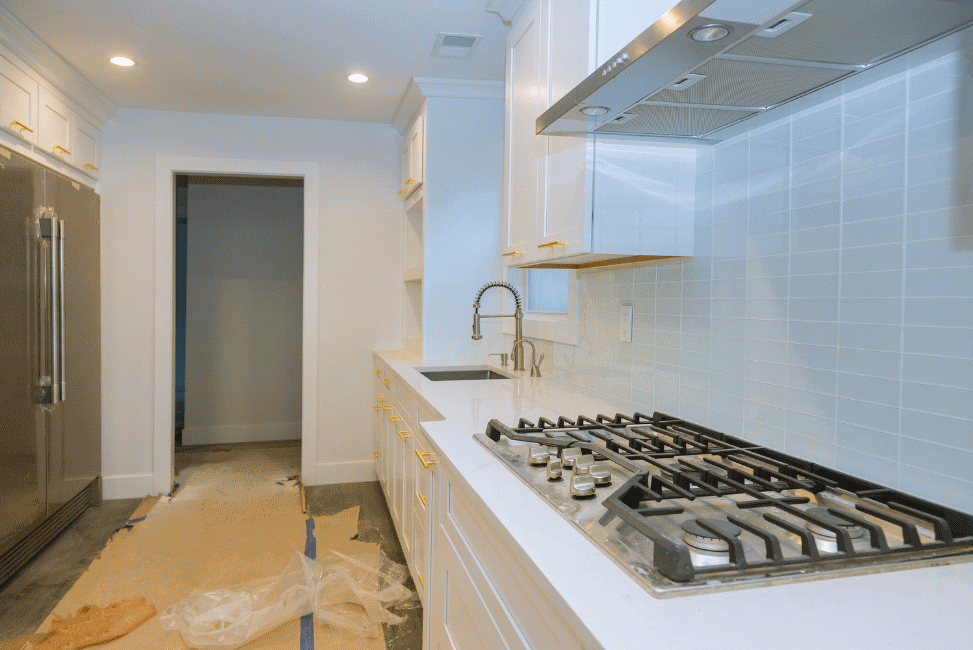
Step 1: All cabinetry needs to already be installed, level, and secure before template.
Step 2: Have all sinks, faucets, and appliances on-site and easily accessible. If you have a farmhouse sink, we recommend it already be installed prior to your template appointment.
Step 3: Remove all existing or temporary countertops from the template area before your service provider has arrived.
Step 4: If the tile/backsplash surrounding your cabinets is not the tile/backsplash that will remain after your new counter is installed please make sure it is all removed before your template service appointment.
Step 5: We recommend items in your cabinets be removed and/or protected during template and install.
Once your template is completed the fabrication stage can begin. When the material has been cut to the template specifications, you'll be contacted to schedule your installation.
Installation Preparation
The exciting day has finally arrived, install day! To ensure a smooth install, please prepare your space by following the steps below.
Step 1: To prepare for installation the most important thing to do is to have a professional disconnect all plumbing prior to your service providers' arrival, water and gas will also need to be shut off.
Step 2: Designate a circulation pathway to and from the installation area that workers can safely travel. We recommend taping paper down to protect your floors from any scuff marks or boot prints. If your area experiences winter, please make sure the path to your house has been cleared and salted for everyone's safety.
Step 3: Empty all base cabinets to avoid any damage or dust collection on your cooking tools.
Step 4: To protect against dust accumulating in surrounding areas close doors and/or drape your furniture. We also recommend covering any vents that may spread dust particles through your home.
Step 5: Have sinks, faucets, and appliances on site but not in the way of your service providers safely transporting your countertops.
Step 6: Have an adult representative present for the service window and final inspection.